[Mastering Oracle SQLcl Liquibase - Part 1/3] Move all database objects from DEV to the UAT environment
![[Mastering Oracle SQLcl Liquibase - Part 1/3] Move all database objects from DEV to the UAT environment](/_next/image?url=https%3A%2F%2Fcdn.hashnode.com%2Fres%2Fhashnode%2Fimage%2Fstock%2Funsplash%2FttbCwN_mWic%2Fupload%2F8c6cd9e9d85bdc4538813726620ee5fd.jpeg&w=3840&q=75)
Oracle APEX & PL/SQL Developer with 10 years of experience in IT, including financial systems for government administration, energy, banking and logistics industry. Enthusiast of database automation. Oracle ACE Associate. Certified Liquibase database versioning tool fan. Speaker at Kscope, APEX World, SOUG, HrOUG, POUG and DOAG. Likes swimming in icy cold lakes in winter and playing basketball.
Are you tired of complex and time-consuming database management processes? Look no further!
You can effortlessly make changes to your database and seamlessly transfer them to other environments.
The best part?
Tracking and migrating new changes becomes a breeze, all with just two simple commands.
Demo prerequisites
SQLcl installed (version 23.1 at the time of this blog) on local OS (Liquibase is already built-in). Don't know how to install SQLcl?- read my other blogpost.
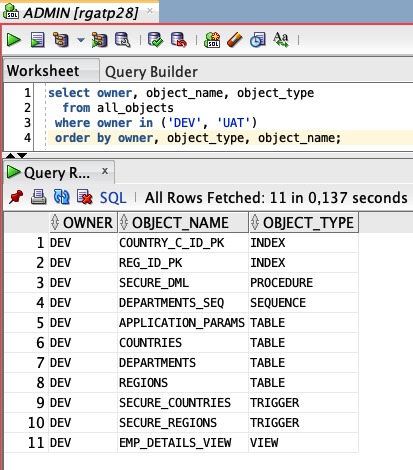
I will use two separate schemas, DEV and UAT, created at one OCI Database (my TNS name is rgatp28_low) to simplify things.
DEV schema has some objects, and the UAT schema is empty.
If you want to practice the demo with me, you can use the same objects I use. You can use the sample objects script from here.
What do I want to achieve?
I want to move all my objects from DEV to UAT.
I don't want to think about what should be moved to UAT and in which order. I want SQLcl to do it for me.
What's more - I won't create any changesets or changelogs you should normally do when using Liquibase (Read more about it here).
1.Capture the current state of the DEV environment
Create a folder "database" in your local OS and go into it.
Connect to your DEV schema using SQLcl.
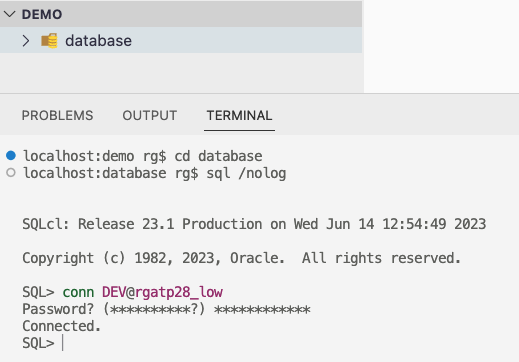
Capture your current state of the DEV schema by using the first command:
liquibase generate-schema --split
Generate-schema command captures all of your schema objects
Parameter --split is responsible for moving all captured objects into subdirectories (depending on object type)
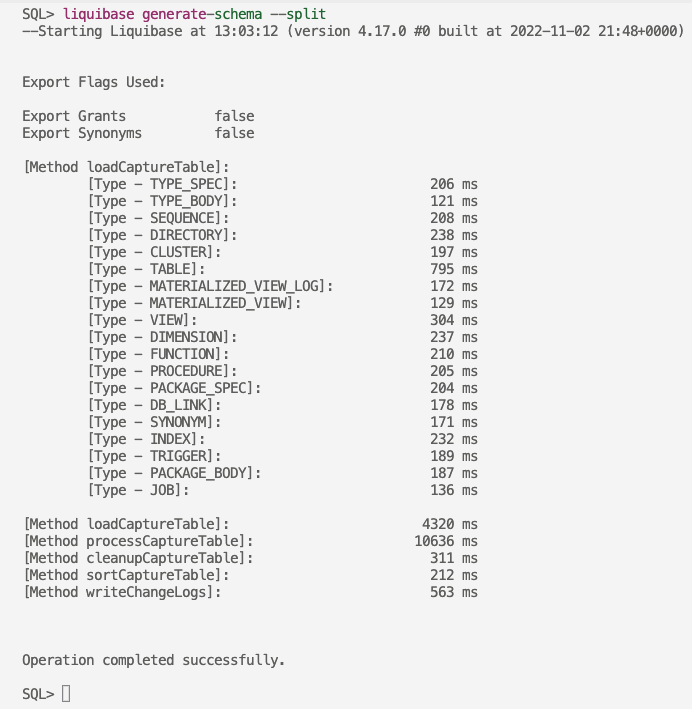
Remember, by default, SQLcl doesn't export grants and synonyms.
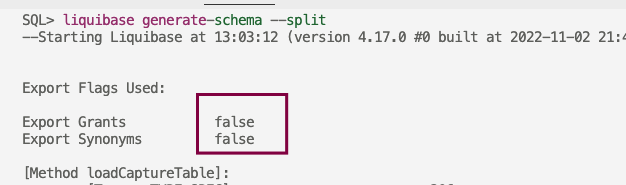
If you want to include grants and synonyms, add a parameter(s) to your command:
liquibase generate-schema --split --grants --synonyms
Okay, let's take a look at what files and folders were generated automatically (without grants and synonyms):
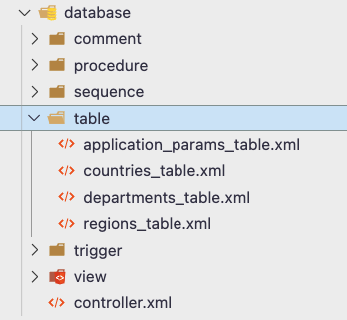
In subdirectories like comment, procedure, table, etc., there are changelogs containing database objects in XML format.
We all love SQL, so you don't even need to open these XML files.
There is also another XML file generated automatically - controller.xml.
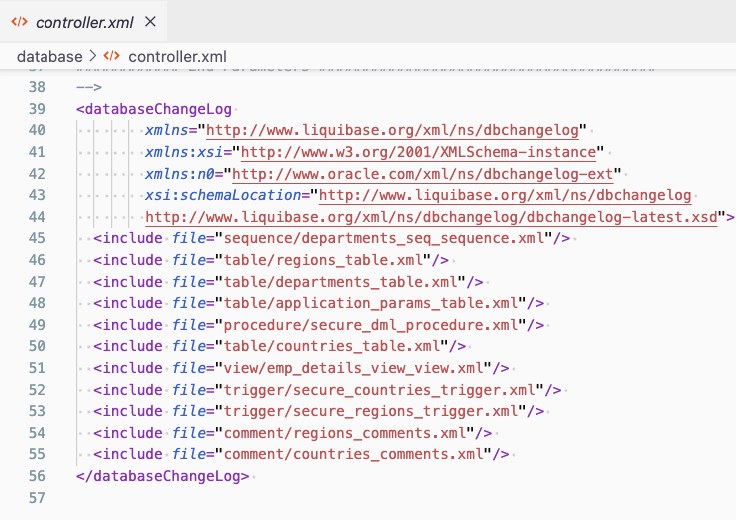
SQLcl Liquibase treats it as a ledger, a root of all changes. That file holds information in which order objects should be executed.
As I mentioned, you don't need to open it or change anything. Liquibase will handle all execution orders for you. Isn't it great?
2. Move all objects from DEV to UAT schema.
Connect to UAT with SQLcl (there are no objects on UAT yet)
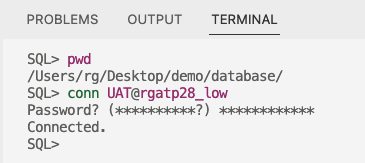
Run liquibase update command:
liquibase update --changelog-file controller.xml
This command will execute all objects on the UAT schema in the order specified in controller.xml
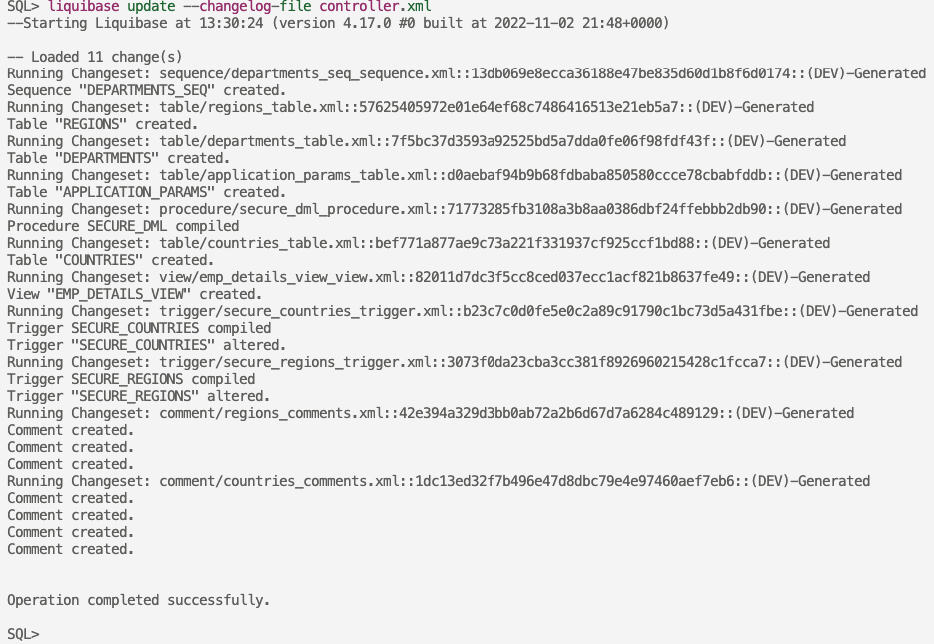
That's it. All objects were moved from DEV to UAT.
Additionally, Liquibase created a few objects to store information about which changes were executed to the database.
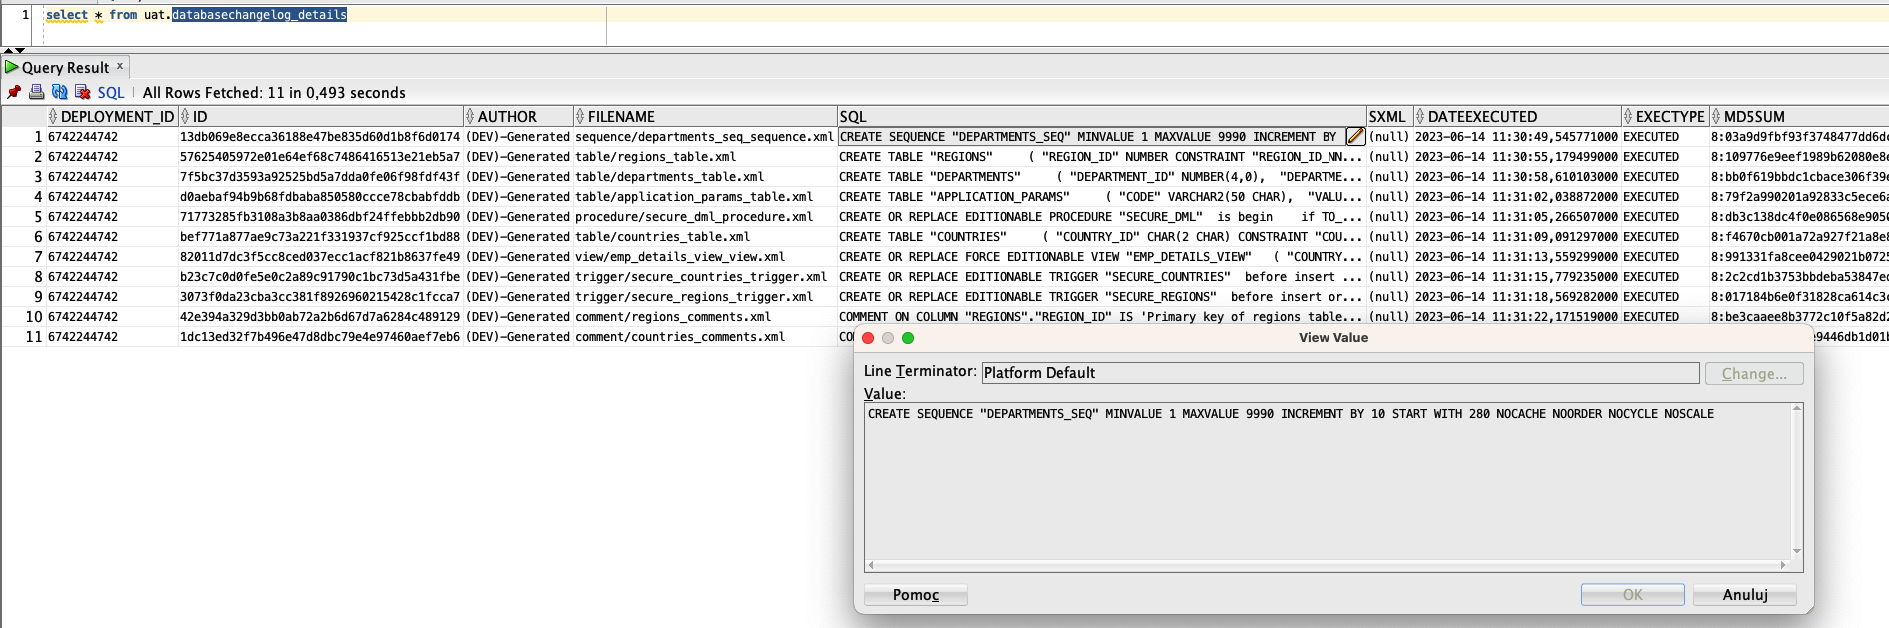
Check, e.g. databasechangelog_details view to see what and when it was deployed. What's more - there is also exact SQL that was executed.
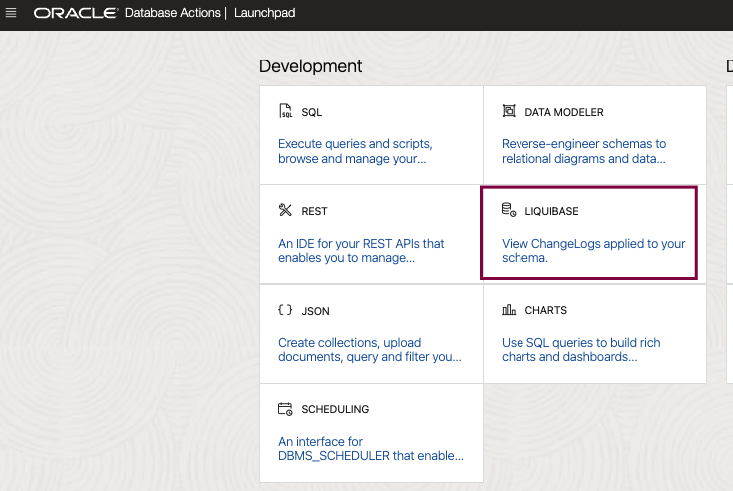
If you're using Oracle OCI, you can also preview your deployments using Oracle Database Actions (remember to REST enable your user first!).
That's all for now. Stay tuned for the next blog posts.
Part 2 will cover making a few DDL changes directly in the DEV database schema and moving only changed/new objects to UAT.
If you'd like me to cover a specific feature of SQLcl Liquibase, drop me a comment.
p.s. If you don't want to capture the whole schema, you may want to read this.